At the core of WordPress plugin development and maintenance, whether open source or commercial, is the ability to catalog a list of versions over time.
Each entry in this catalog should follow a standard format of versioning and have clear notes about what changed so users understand what to expect with any particular version.
GitHub’s built-in releases are the best way to meet these requirements
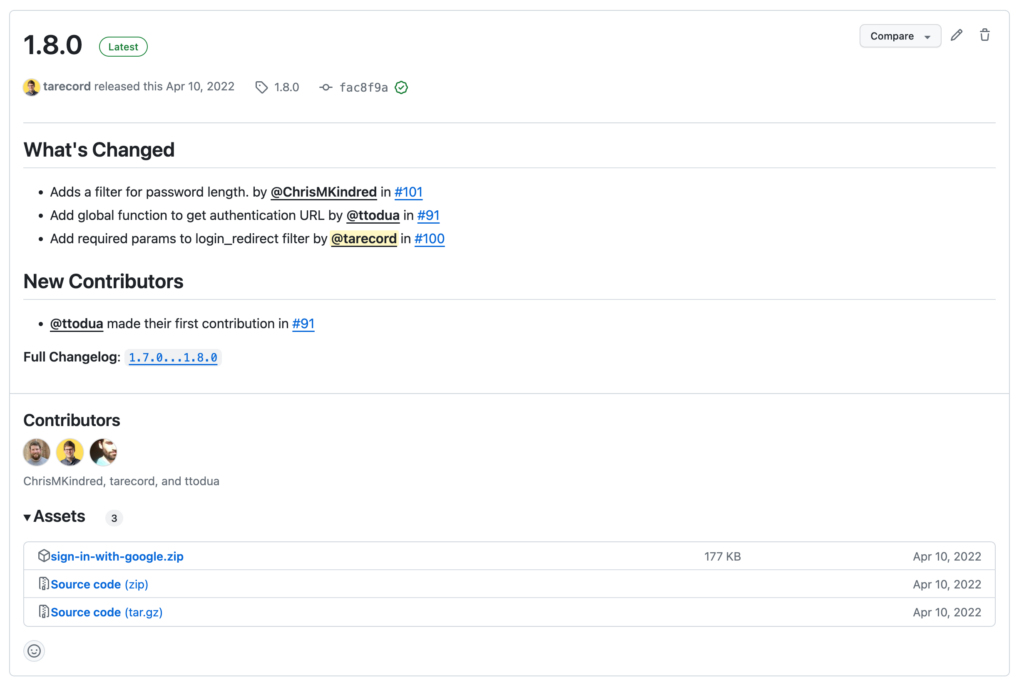
Creating individual plugin releases within GitHub:
- Gives clear context around a specific plugin version
- Helps package up necessary context with a built plugin zip
- Creates an event that can trigger a number of different GitHub Actions
- Provides links and annotations directly to the pull requests that were made
If you’re managing your WordPress plugin development within GitHub, you should be using releases.
Here’s how, step by step:
Define A Release Cadence
How often will you create a new release of your plugin?
If you’re a sole owner of a plugin, your definition of when releases can go out might be as simple as “whenever I add a new feature or fix a bug”.
That’s totally fine, but you should at least have that documented somewhere (probably in your readme).
If you’re working with a team, you’ll likely spend more time defining your plugin’s milestones—Mapping out which features & bugfixes will be addressed in them.
Once you’ve defined a milestone, you have a goal that you can work toward and know when you’ve reached the point where a new version of the plugin can be released.
Tag a New Release
You’re ready to release a new version of your plugin and announce it to your users.
First, navigate to the releases section in GitHub:
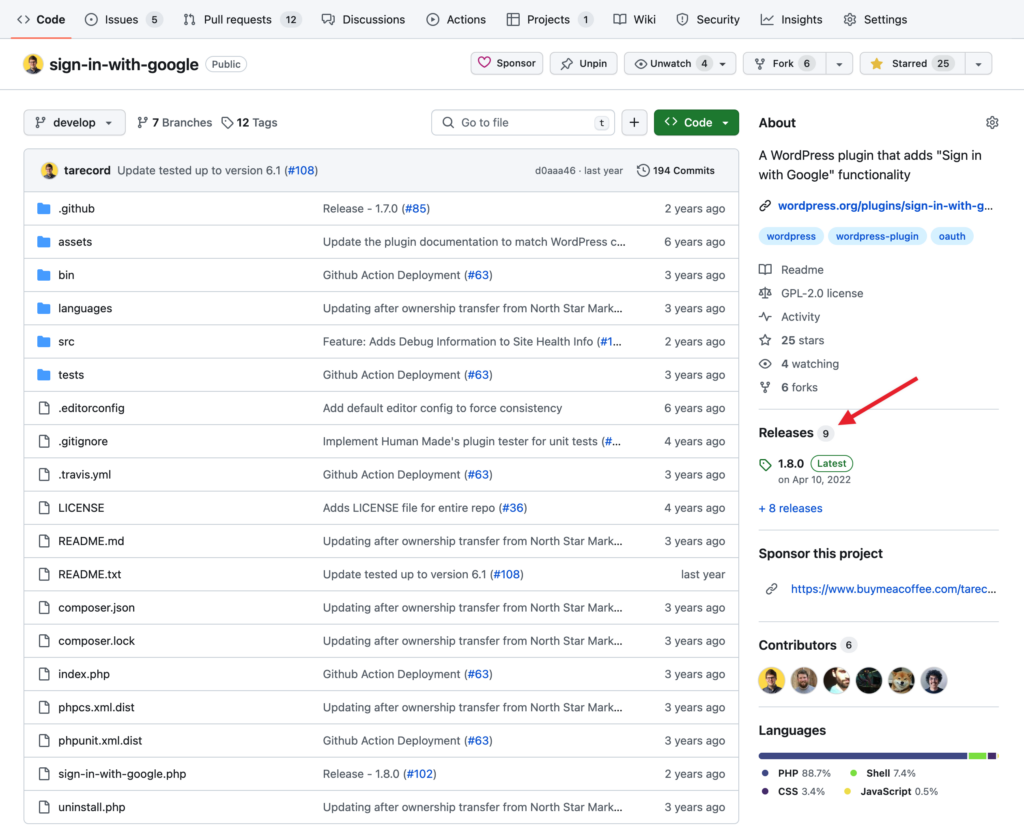
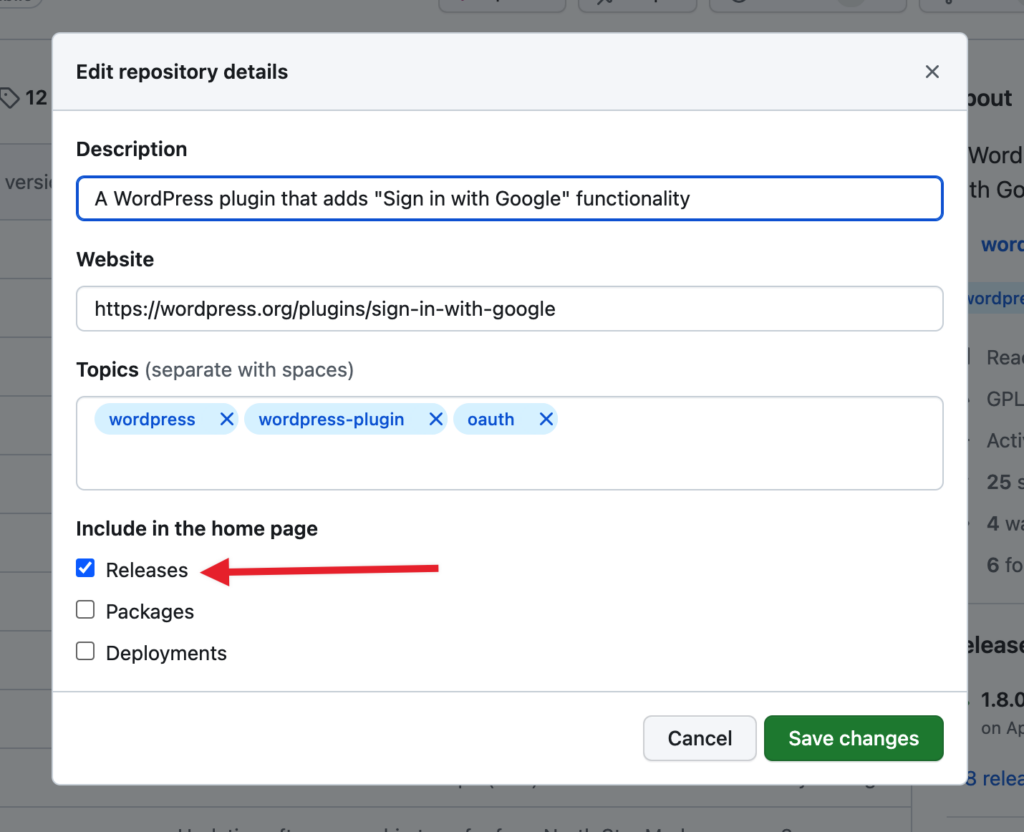
If you don’t have a Releases section, then you may need to enable it for your repository.
If that’s the case, just click the gear icon in the top right of the about section and choose to include releases in the home page.
Once you’ve navigated to the Releases, page, click on “Draft a New Release” and for the name of the release, just type in the tag (plugin version) of the release you’ll be creating.
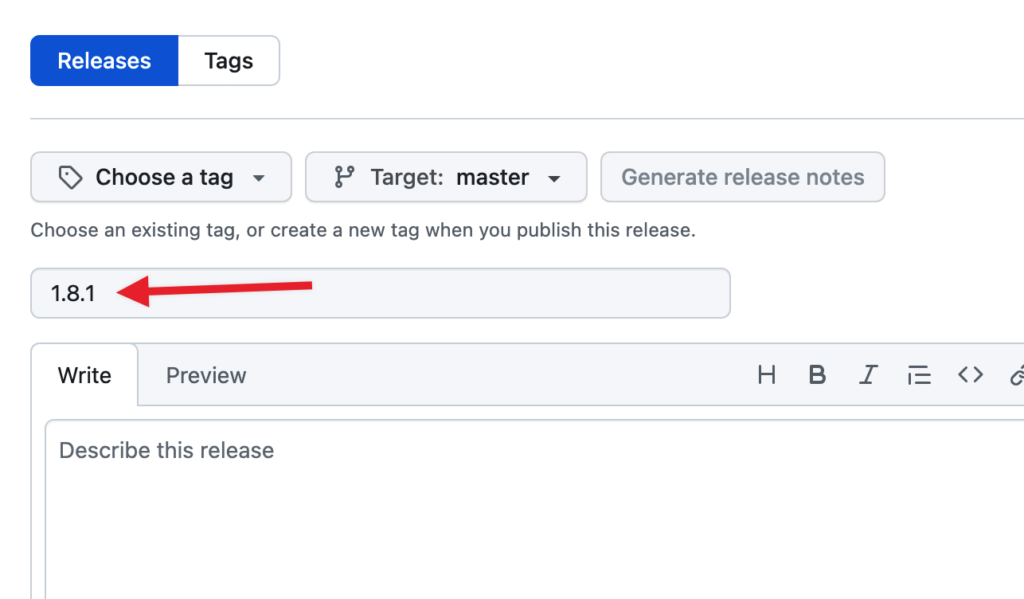
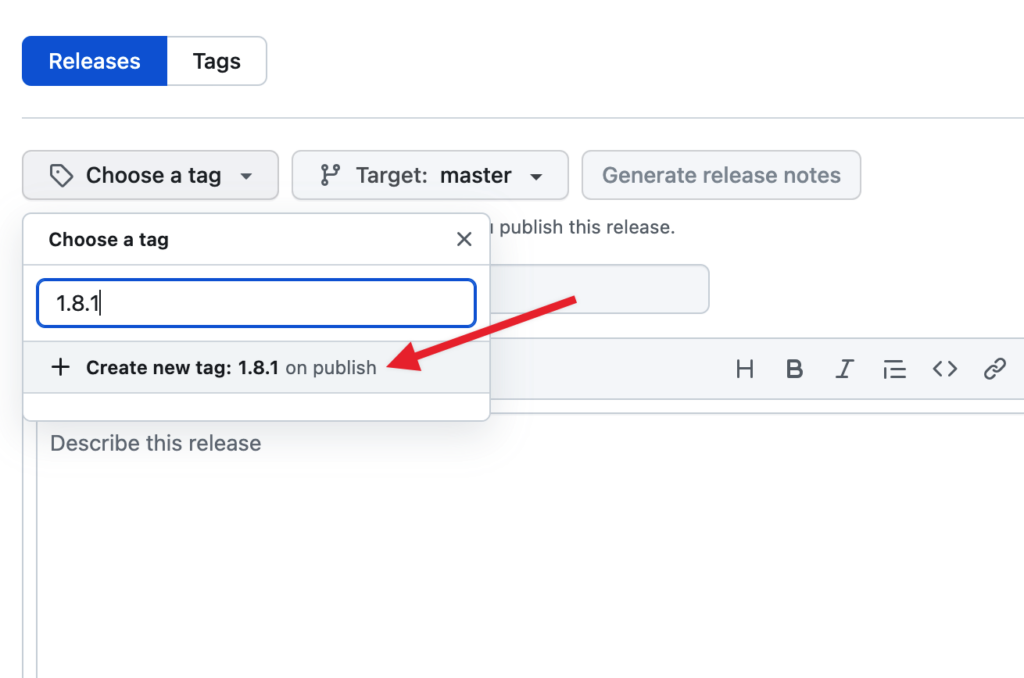
Next, click “Choose a tag” and start typing in the tag you want to create and the branch that you’d like to create the tag on. Typically, this will be your default or primary branch.
If the tag hasn’t been created yet—since we’re creating the latest release—click on the option that will create a new tag on publish.
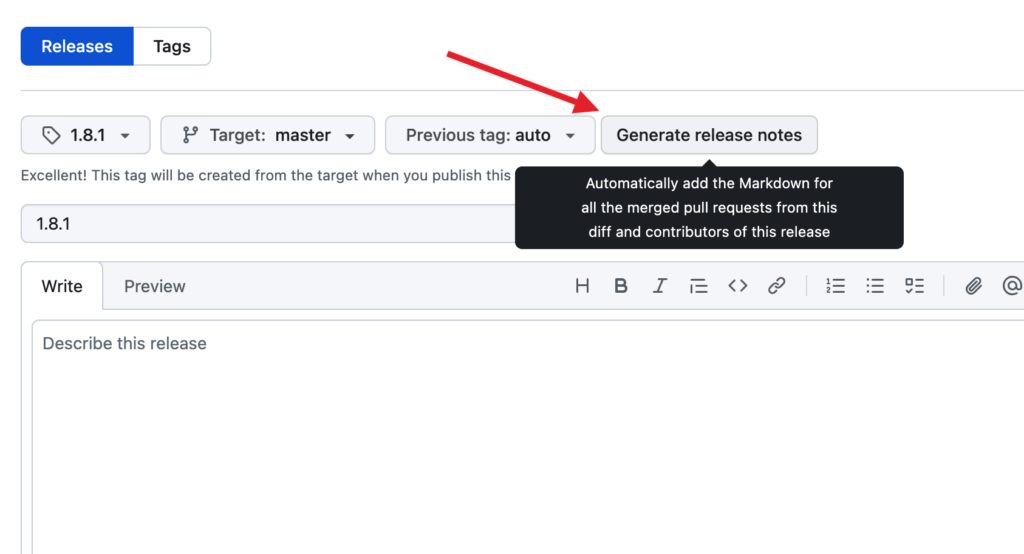
Once you’ve set up the tag and the title, now you can start describing the release in the body section.
Fortunately, GitHub provides a handy button that will generate some nicely formatted text for you that tags contributors and links to merged pull requests for you.
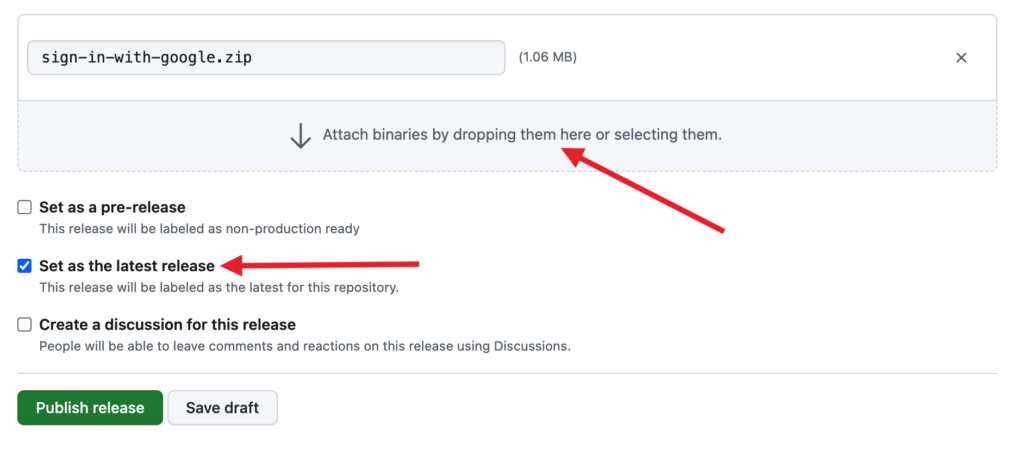
Finally, when you have finished writing your release notes, drop in your compiled plugin zip for the release (this should be your production ready build for the version you’re releasing).
Then set it as the latest release, and click “Publish Release”.
In Summary
GitHub has fantastic tools to help you organize your work, and the way it handles releases is great.
You can bring together a specific version of your plugin with its context directly within the code.
It also helps you grab a specific version if you ever need to in the future to test a bug or provide it to a user.
Releases are a great way to manage releasing new versions of your plugin and the perfect event to trigger the rest of your plugin deployment to the WordPress repository.


